GPIO performance on raspberry pi is an often discussed topic.
New scratch uses a build in gpioServer, other options are scratchClient.
Especially stepper motors need quite high pulse rate, so I have set up a test harness for a small stepper with 2ms step width. The scenario are
- a DMA pulse driven approach
- a python program
- scratch, using scratchClient
- scratch, using GPIOserver
The main focus is on performance of scratch to GPIO.
For scratchClient, some bottleneck analysis is performed.
DMA created pulses
As expected, DMA pulse widths are precise. The glitch on third line is due to a limitation in my modified RPIO.PWM-library which does not yet allow impulse roll over. The interval time printed on the image is for four steps and precise 8ms.
This DMA approach is listed for reference only, as it is not easily controllable from scratch. It is either on or off, but number of pulses can’t be determined.
python created pulses
python code is also pretty good. Pulse with is exceeding the expected 8ms by 0.5ms, which could quite easily compensated by some more advanced time handling.
scratch and scratchClient
The scratchClient approach is expected to be slower. Time scale is changed for this chart and the result is 326ms for 4 steps, which is 40 times slower than python or DMA.
scratch with gpioserver
GPIOserver, build in into scratch, is finally at 101ms, three times faster than scratch with scratchClient, only 12 times slower than python. The assymmetric pulses are due to to ‘forever loop’, I suppose.
All of the measurements have been taken on a RPI2, Model B, raspbian ‘jessie’, scratch is 2015-11-11.
Python is 2.7, the DMA code is a modified RPIO.PWM, adjusted for PI2.
scratchClient bottleneck analysis
The result for scratchClient was unexpectedly bad. So I have set up some tests to find out where the bottleneck is located.
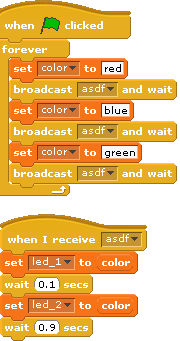
First approach was to change the variable based communication to the stepper module by an event based ‘broadcast’. This approach resulted in 101ms cycle time, a good match to the result from GPIOserver.
Second approach was to write a small python code which simulates scratch: a socket server for port 42001, sending out sensor updates like “sensor-update “br0.0” 0 “.
The delay time was 2ms, and the result from this is a cycle time of 9ms. Pretty close to the pure python approach.
From these results it is clear that the bottleneck is on scratch side. Looks as if scratch variable access and sending them out is three times slower than sending out broadcasts from scratch.
Socket communication imposes some overhead, but is not limiting performance.


