see also: Arduino UNO, NANO connected to Scratch
Atmel 328-Prozessor used as AD-Converter
The microcontroller ATmega328P in DIL-package can be used on a breadboard.
This controller has many build-in functions, as ADConverter, timers SPI and more.
The Arduino boards use this controller, making it very popular and many literature is available.
The ADC has 10Bit resolution and in DIP package there are 5 channels available.
Wiring to Raspberry Pi is quite simple. The firmware can be programmed directly from RPi, no programming device needed. The focus of this article is not the programming of the device. The needed firmware is attached to the samples.
Cost of the devive are comparable to simple ADConvertes and are about 4€.
Disadvantage is the more complex setup needed.
On the download page, I provide a firmware which can read two AD-channels and to control a LED. More functions are planned, as frequency measurement, infrared control or rotary encoders.
The firmware of the controller can be programmed with the RPi. No extra flashing hardware is needed.
Prerequisite is that the controller has the internal 8MHz oscillator enabled. This is factory preset.
Basic setup of the controller is defined by ‘fuses’, especially the setup of the oscillator used. Without a working oscillator, programming is not possible.
If you get an already flashed device, e.g. prepared to be used in an arduino board, these will have internal oscillator shut off. In this case, reading out the software will not work. Workaround is to activate GPIO#4 of RPi as a clock source and connect to the 328. See attachments for a short tutorial. Or to use a flashing hardware.
Caution: when you use a device from an arduino board it is likely that the bootloader is overwritten. There is no simple way back.
parts list
- ATmega 328 P-PU (DIL-package)
- breadboard
- precision socket for the processor. DIL 28 pin, 0.3 wide. Insert the socket to the breadboard, and insert the controller into socket. The controller can be used directly, but with the socket insertion and removal is simpler.
- LED. The longer wire is the anode and is the ‘positive’ side.
- resistor 1kOhm
- capacitor ceramik 100nF, min 10V
- trim potentiometer for test
- cables f-m, 7 or 8 pieces
- wires for breadboard.
Setup procedure
Basic steps are wiring, flashing the controller and activating scratchClient software.
electrical setup
Shut down RPi and disconnect power source.
Place processor on breadboard and connect according to scheme.
VCC 3.3V is taken from from Raspberry.
SPI-connections MISO, MOSI, SCK and SS at CS0 of RPI allow communication.
RESET pin 1 to GPIO24 is needed for flashing in addition to SPI.
LED with serial resistor 1kOhm is connected to PB1, Pin 15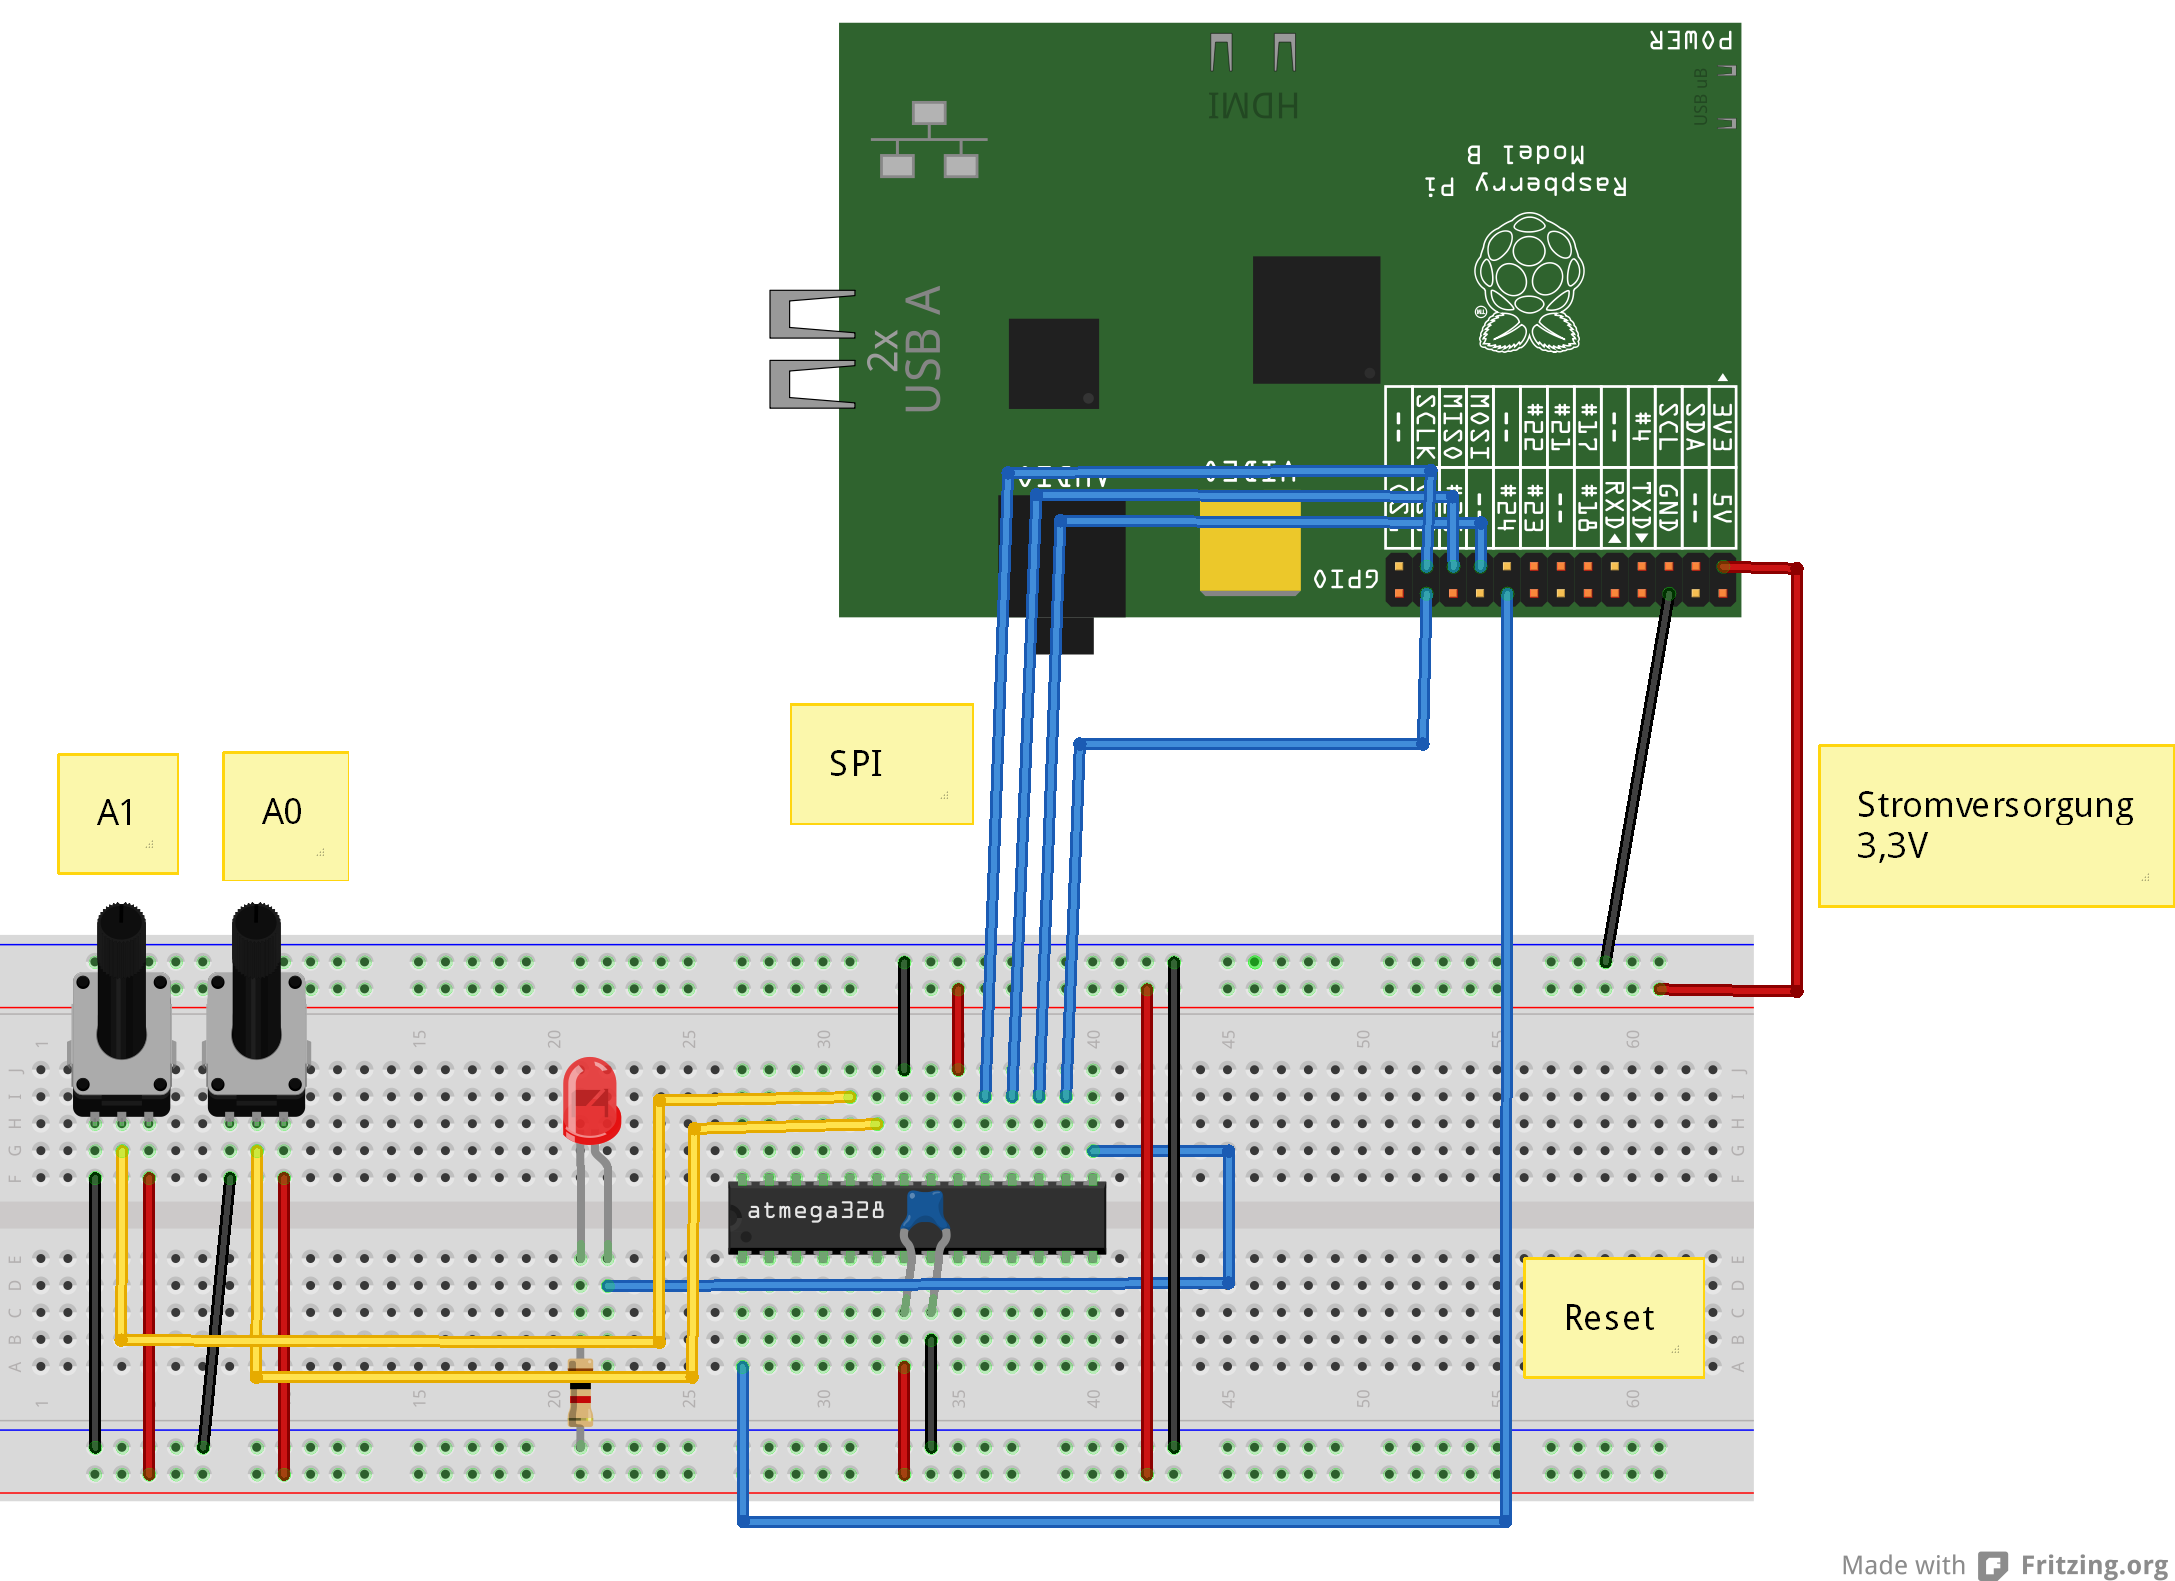 .
.
ADC-inputs used are ADC0 and ADC1, Pin 23, 24.
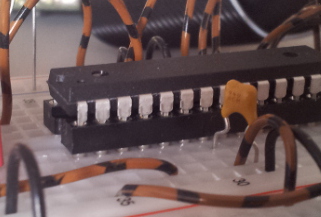
This is how the controller sits in socket on breadboard.
Installing flash software on Raspberry Pi
sudo apt-get update
sudo apt-get upgrade -y
sudo apt-get install python-dev pip
sudo pip install spidev intelhex
Activate SPI driver. Use raspi-config , enable SPI.
Copy the programming software to /home/pi .
Download software and store in /home/pi and unpack “tar xfvz program_328.tar.gz”.
tar xzvf program_328.tar.gz
Validate hardware and software setup
The following steps validate correct cabling and whether flashing the controller is possible.
Read Fuses
cd ~/program_328
sudo python src/program.py -rf
The output should look similiar to
PROGRAMMING_READ_CALIBRATION_BYTE b0 10110000
 PROGRAMMING_READ_EXTENDED_FUSE_BITS ff 11111111
 BODLEVEL0 1
 BODLEVEL1 1
 BODLEVEL2 1
 PROGRAMMING_READ_FUSE_BITS e2 11100010
 CKSEL0 0 ENABLED
 CKSEL1 1
 CKSEL2 0 ENABLED
 CKSEL3 0 ENABLED
 SUT0 0 ENABLED
 SUT1 1
 CKOUT 1
 CKDIV8 0
 PROGRAMMING_READ_FUSE_HIGH_BITS d9 11011001
 BOOTRST 1
 BOOTSZ0 0 ENABLED
 BOOTSZ1 0 ENABLED
 EESAVE 1
 WDTON 1
 SPIEN 0 ENABLED
 DWEN 1
 RSTDISBL 1
 PROGRAMMING_READ_LOCK_BITS ff 11111111
If there are errors (Device not in sync), then either cables are not correct connected or the processor has wrong fuses already programmed.
Check connections. If error persists, then connect external clock.
Read out current code
Another step in validating the setup is to read current code. Should be empty on a brand new device, but is useful to check communication.
cd ~/program_328
sudo python src/program.py -r
The output should look similiar to
python src/program.py -r
 ('read', 'out.hex')
 programming_readCode
 programming_enable
 ('PROGRAMMING_ENABLE', [172, 83, 0, 0])
 (0, [255, 255, 83, 0])
 programming_enable end
 programming_disable
 programming_readCode ende
 ok
Flash testcode to controller
When everything went smooth so far, then it is time to load the first testcode into the controller. It dies nothing but let the LED blink.
cd ~/program_328
sudo python src/program.py -p 328/steckbrett_328_blink.hex
LED should blink slowly.
Program Fuses for oszillator
The controller runs with internal oscillator, but frequency is limited to 1MHz. By setting the correct fuses, the Controller runs with 8MHz.
Please do not program the fuses, if there have been errors in steps before (which are not yet fixed) and the LED is blinking.
cd ~/program_328
sudo python src/program.py -wf
Blinking should stop shortly, and restart quicker, 5 times a second.
Oscillator setup is completed now.
Flash firmware to controller.
Final step is flashing the application firmware. It handles the AD-Conversions, LED-Settings and alike.
cd ~/program_328
sudo python src/program.py -p 328/steckbrett_328.hex
After programming is complete, the LED should blink 8 times. This is part of the RESET routine.
Application – testcode
Blink the LED, long bright, short dark.
cd ~/program_328
sudo python src/test_blink.py
The duty cycle is set by the python code in side Raspberry. This indicates that it is the reaspberry having control.
Read firmware version.
cd ~/program_328
sudo python src/test_get_version.py
Display should show ’93 09′; second number is minor version and can be higher.
Read ADC, Channel 0
cd ~/program_328
sudo python src/test_adc_0.py
Scratch-Connection
When tests for application software work, the next step is the connection to scratch.
cd ~/scratchClient
sudo python src/scratchClient.py -config config/config_adc_atmel328.xml
Configuration can be adjusted in the config file. ADC-channels can be enabled / disabled, or reference voltage can be 3.3-V or the internal reference 1.1V.
The internal reference voltage is useful when an tempperature sensor TMP036 is connected.
The 3.3V-reference is perfect when a potentiometer is connected.
The ADC values are sent with variable names ‘adc_0’ und ‘adc_1’ to scratch, range is 0..1023.
Broadcast commands from scratch to controller are ‘led_off’, ‘led_on’.
SPI-Communication between RPi and Controller
SPI is a synchronous protocol. The Controller as slave has no chance to indicate ‘slower please’ to the master. Therefor, each command from RPi to controller needs to be answered in the time between receiving the first an second byte of a sequence. Otherwise, there will be garbage read back.
This limits transfer speed to 240kHz with the 8MHz controller. With the 20MHz variant, this will be faster.
Appendix: GPIO#4 of RPi as clock-input for 328
Der GPIO#4-Pin can be configured to provide a MHz range clock signal for the controller. The program for this is in bin/-folder. It is based on code from guzunty.org.
Connect GPIO#4 with XCLK-Eingang of controller. Then start program bin/gz_clock_1.92MHz.
cd bin
chmod +x gz_clock_1.92MHz
sudo ./gz_clock_1.92MHz
While this program is running, execute read/write of fuses in a second terminal window.
Then disconnect GPIO#4.
Update history:
2014-04-01 Fixed connections of LED