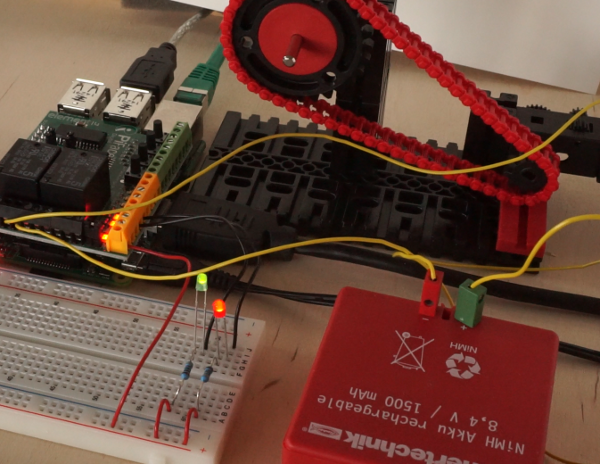
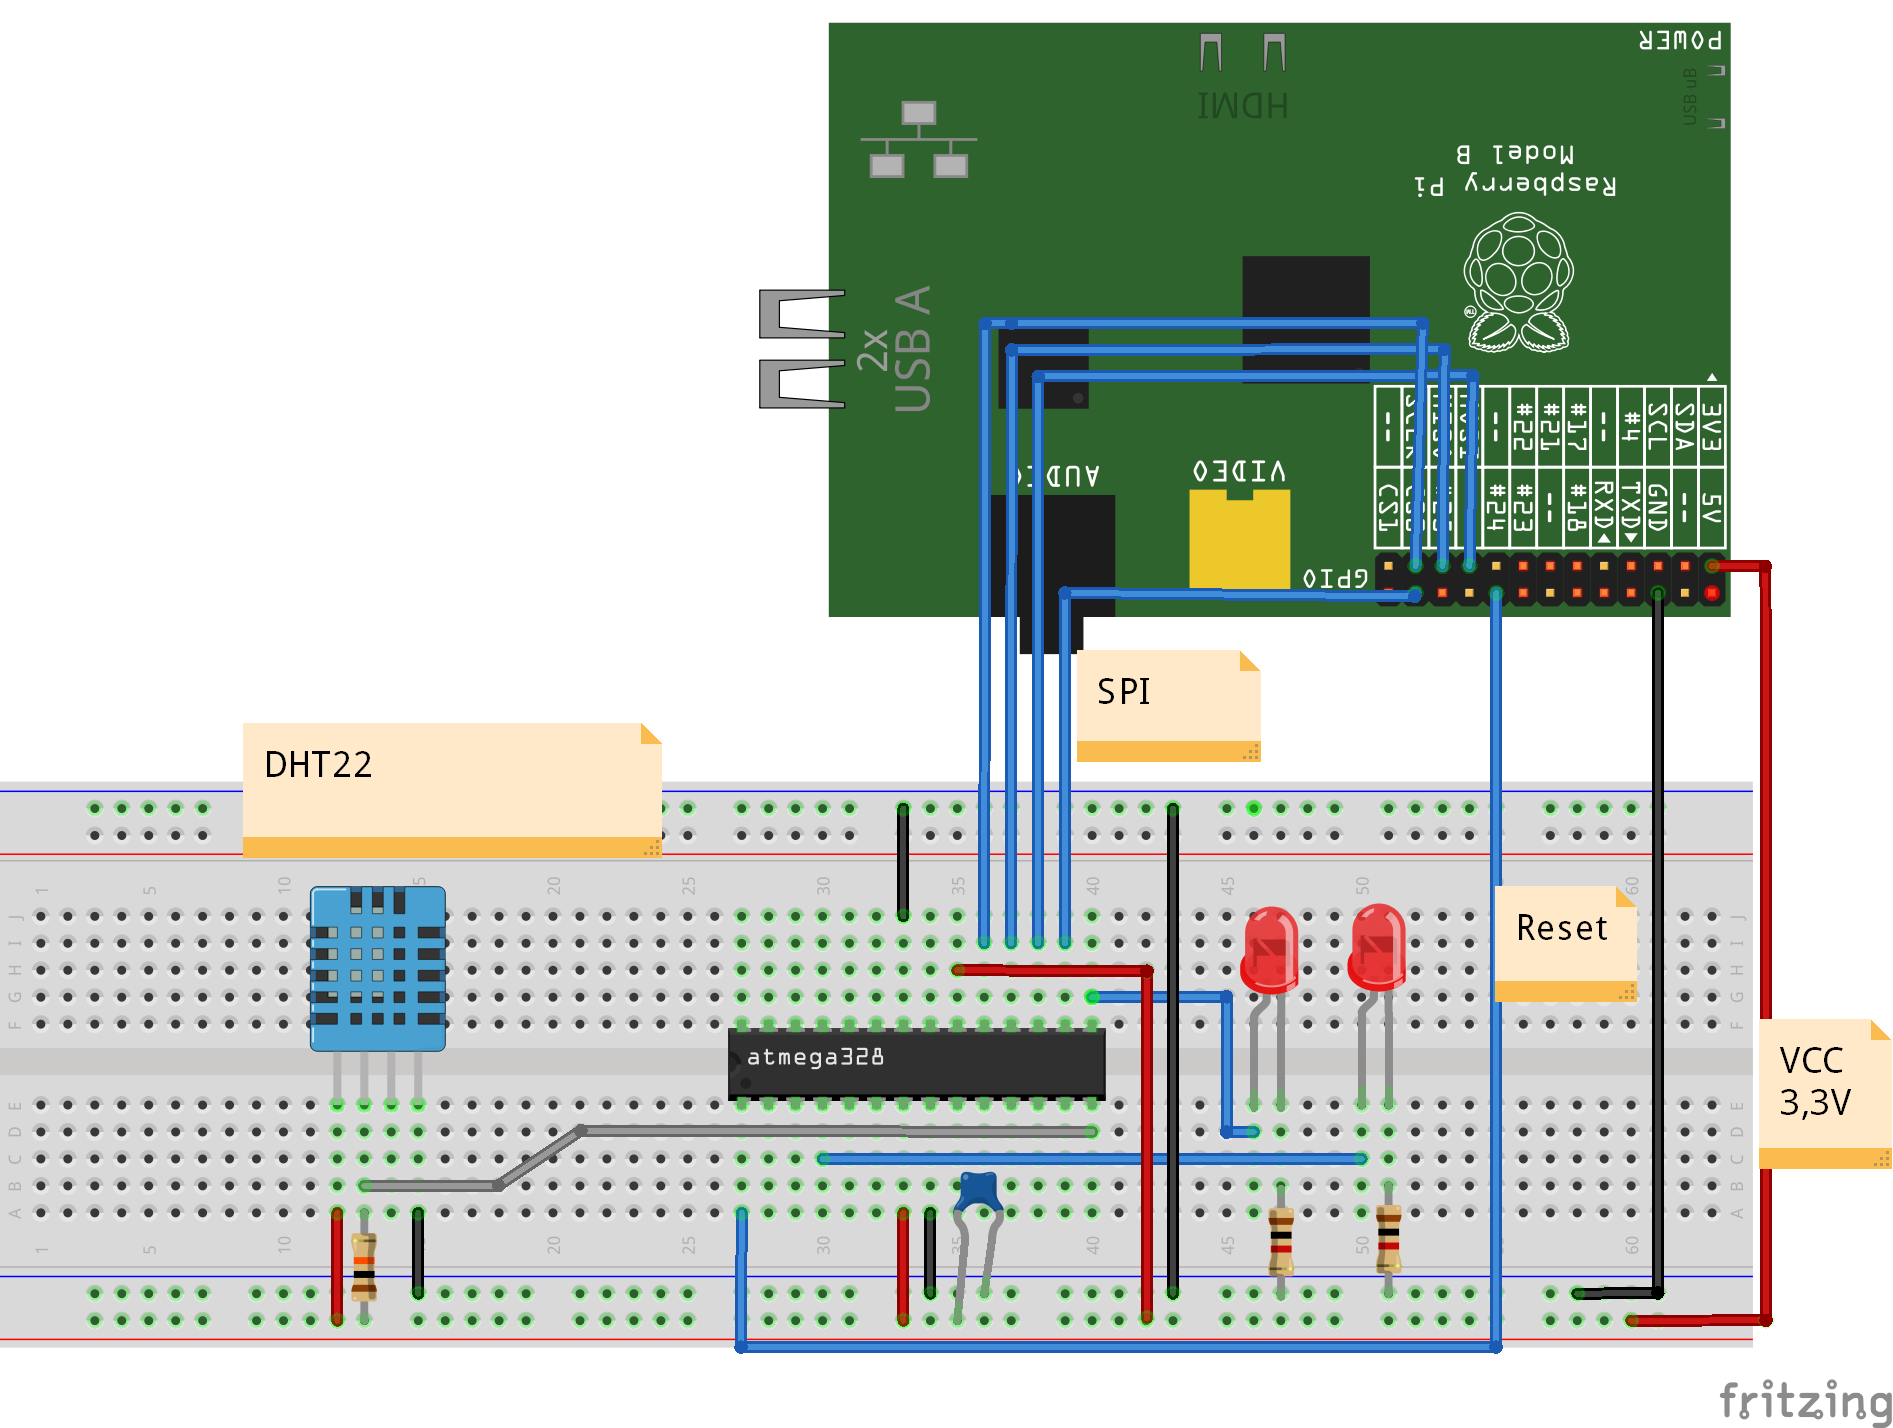
In a workshop in a school, the kidsare building a computer game and to control it by a hand made ‘controller’. Most teams have 2 potentiometer and buttons build in a box, and the adapter board plus python scratchClient is sending the values to scratch. In most games, the xPoti and yPoti control some sprite on the screen.
When the applications grow, most teams complain that the computer is too slow. I admit, a raspberry pi is no supercomputer-high-performant unit. But in most cases there are typical patterns of code to be avoided. These are the ‘performance antipatten’.
See here some of these pattern, and possible workarounds.
forever-move-pattern
Most teams implement movement patterns the following way.
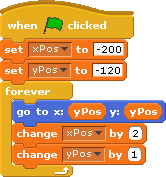
The problem with this script is that it consumes a lot of CPU power. When more than one sprite is moved this way, then all the sprites get slow.
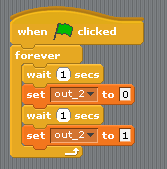
First improvement is to use a small delay in the loop.
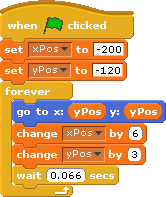
Now the script makes short pauses and CPU is free to perform other action. The drawback is that the steps need to be larger and movement is not perfectly steady.
Next improvement is to use the ‘glide’-statement instead.
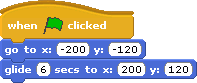
This is – for this purpose – the perfect solution. CPU -efficient and smooth. The only problem is that this movement can’t be stopped.
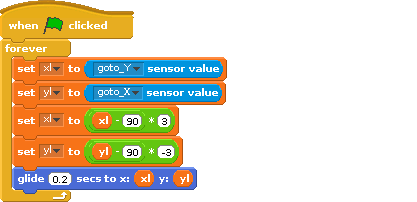
always-move-pattern
We use sensor values, here adcValueX and adcValueY to control sprites on stage.
The following loop is quite a challenge for the Raspberry Pi.
repeat forever
    x = adcValueX / 2.2 - 240
    y = adcValueY   / 2.8 - 180
    move object to (x, y)
The scaling is not the problem, but small fluctuations in the sensor values cause the sprite to move, using CPU for almost not visible movements.
There is some noise limiting in the scratchClient for the adc channels, but even with stable input values this nice and innocent looking loop is a performance eater.
When changing the code to a ‘move only when changes occur’, the CPU load is much lower.
-
local.adcValuePrevX = -1
local.adcValuePrevY = -1
local.x
local.y
repeat forever
    if abs( adcValuePrevX - adcValueX ) > 4 OR  abs( adcValuePrevY - adcValueY ) > 4
        x = adcValueX / 2.2 - 240
        y = adcValueY   / 2.8 - 180
        move object to (x, y)
        adcValuePrevX = adcX
        adcValuePrevY = adcY
With this script, given in pseudocode, the sprite is moved only when noticeable movements are needed. Perhaps a small wait-time would even give better results.
variable-on-stage-pattern
Variables on stage are consuming astonishing much CPU. Moving a sprite is fast, when no variables are displayed. When variables are on stage, CPU usage increases to 100%.
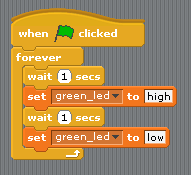
When variables need to be displayed for debug purpose, then provide a script which hides/displays them.
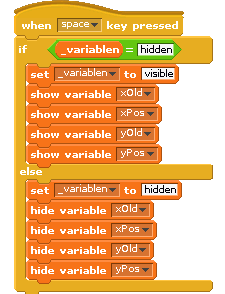
Note on this pattern: with scratch 2015-01-15, the performance of watchers on stage is much better.
loop-pattern
In almost all projects the kids developed I found the pattern: loops to make decisions.
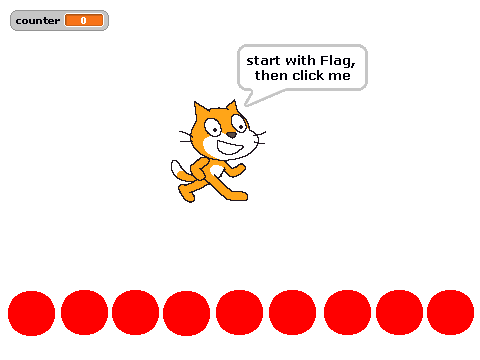
The example here is a counter value, visualized on stage by some red bubbles. The bubble implement a loop, basically ‘when counter > 3 then show, else hide. This check is performed in a loop. For this example, this needs nine loops, running all the time.
For the ‘red bubbles’. the kids start with looping solutions.
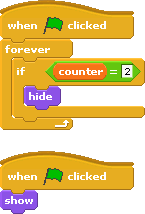
These small loops cost about 5% CPU load each, for the above example this is quite expensive.
The better approach is to go for an event driven solution. When changing the variabls, an event is send. The ‘bubble’-sprites react on these events. The loops no longer needed.
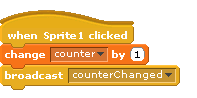 Sender side.
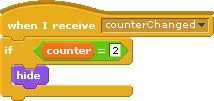 Receiver side.
The difference in CPU load on a Raspberry Pi B is 80% for the loops and 35% for the event driven solution.
The samples are downloadable here:
loop-pattern-0.sb (with loops)
loop-pattern-1.sb (with events)
loop_when_needed
Loops can not always be avoided. But when needed, these loops should be shut down when not needed in order to reduce CPU load. Here first the CPU consuming pattern, two loops started at Green Flag, running forever.
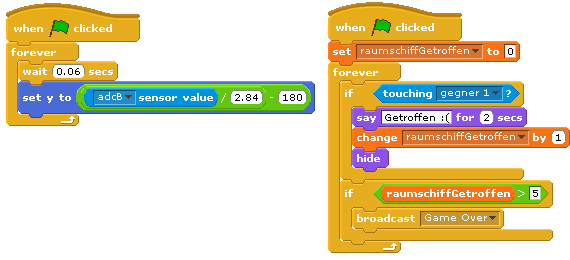
These loops have been needed for the application, so the only way is to start them only when needed and stop them when this part of the application no longer is used.
The blue boxes show the changes. When a certain situation needs these loop (here when ‘3 Spiel’ is started), the scripts set a local variable ‘move’ to ‘true’. This is done in each script, as there is no guarantee in which order these scripts are started (left first, then the right one; but could also be other way round). The move variable is sprite-local, because then the same name can be used in every sprite for this purpose, making it easier to understand.
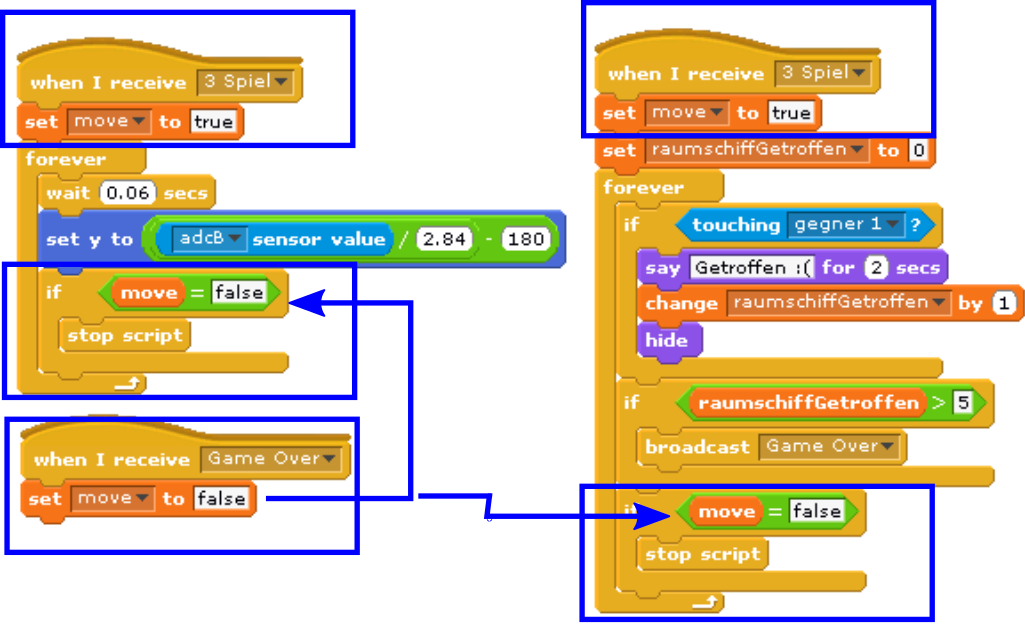
Inside the loop, there is a check whether this variable is set to false, and then the loop is terminated.
The ‘Game Over’ signal sets the ‘move’ variable to false. Then the loops are stopped.
This pattern needs a good understanding of when scripts need to be executed and when to be stopped.