Monthly Archives: April 2019

scratch 1.4 mesh network with scratchClient

Scratch 1.4 on raspberry pi allows to connect with other scratch instances on other computers.

This is an experimental feature. This feature is not available in scratch1.4 for linux or windows, not in scratch2.

With this feature multiple scratch 1.4 can share events and (global) variables.

As this feature is experimental, there are some constraints and problems especially when scratchClient is used also.

ScratchClient has a feature to interconnect computers too. This uses scratchCommunicationServer.py which allows filtering and segmentation of larger networks.

Enable Mesh Session

Scratch 1.4 has a ‚Share‘ menu point. This menu has different content when ‚shift‘ is pressed before the mouse click.

Enable mesh session by ‘shift’ and press ‘Share’-menu.

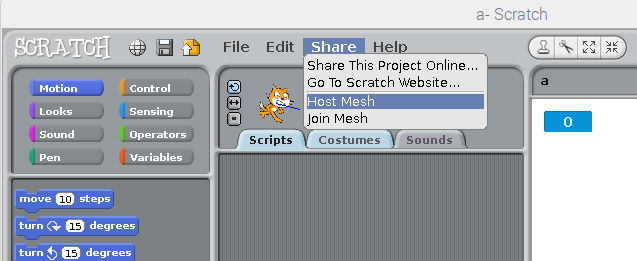
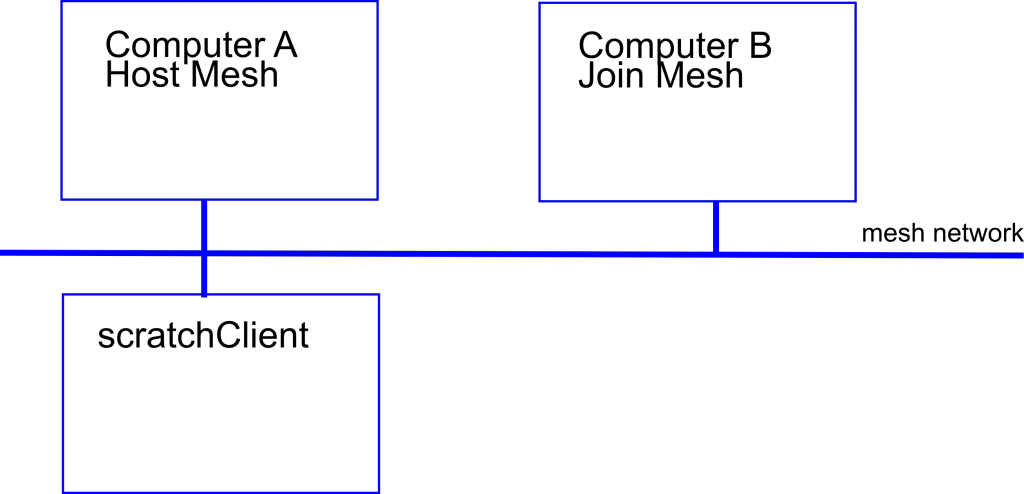
‚Host Mesh‘ means that this scratch is opening the mesh. It ‚hosts‘ the mesh. In other words this scratch becomes a server.

‚Join Mesh‘ means that the scratch connects to a mesh network another computer has opened before. In other words this is a ‚client‘. The client needs to know the IP address of the server.

When ‚Host Mesh‘ is executed, the IP address of the computer is displayed.

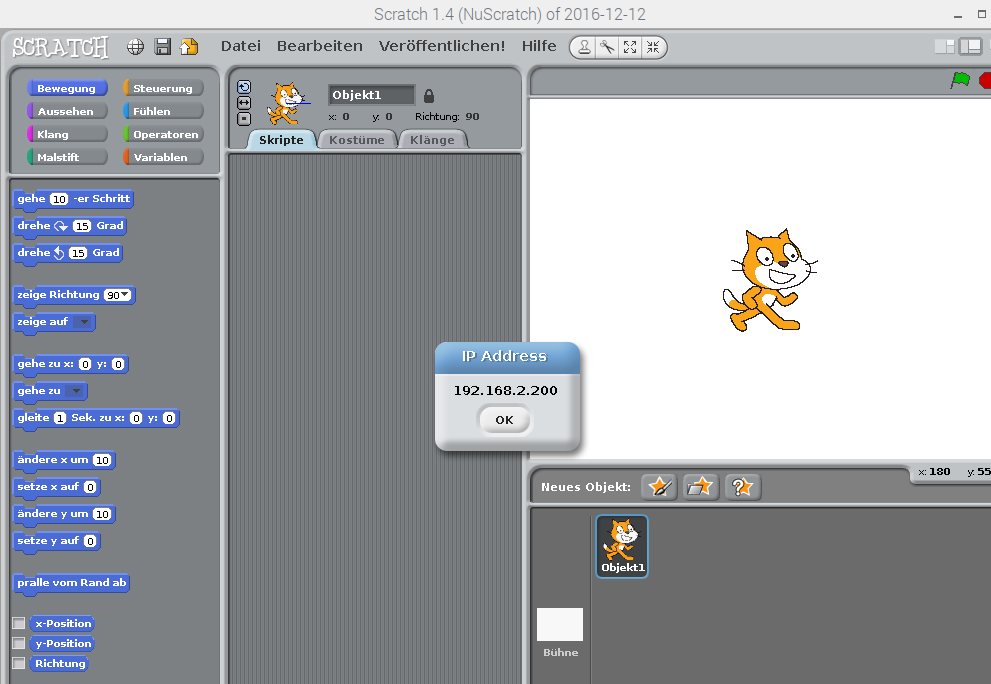
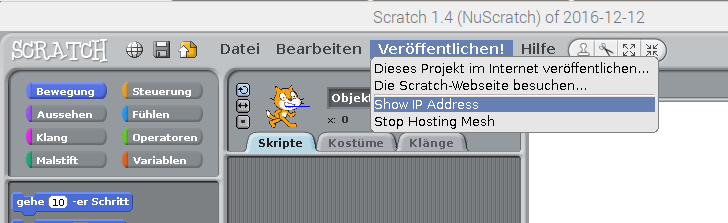
There is a menu entry on a ‚host‘ computer which allows to display this again:

Computer A:

enable ‘host mesh’ session
display ip address, e.g. 192.168.2.200

Computer B:

join mesh session
enter ip address of computer A

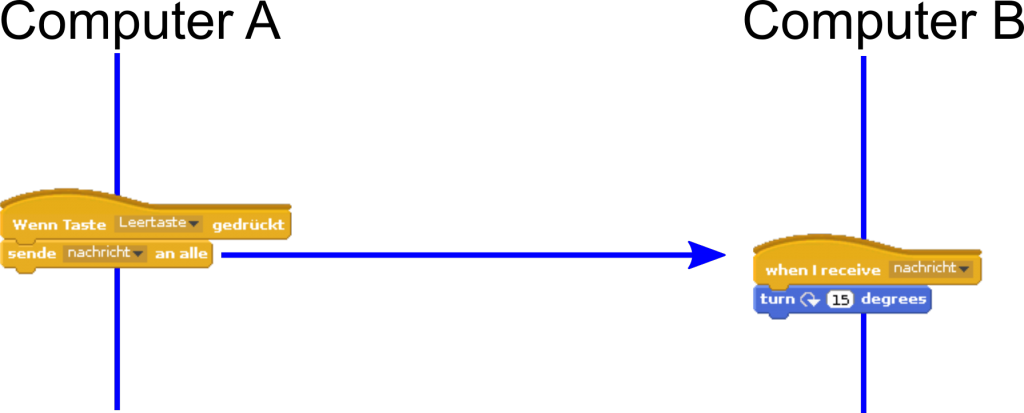
Broadcast events of one computer are sent to computer B also.

Global variables of one computer are visible on ‘sensing’ tab, sensor values on the other computer.

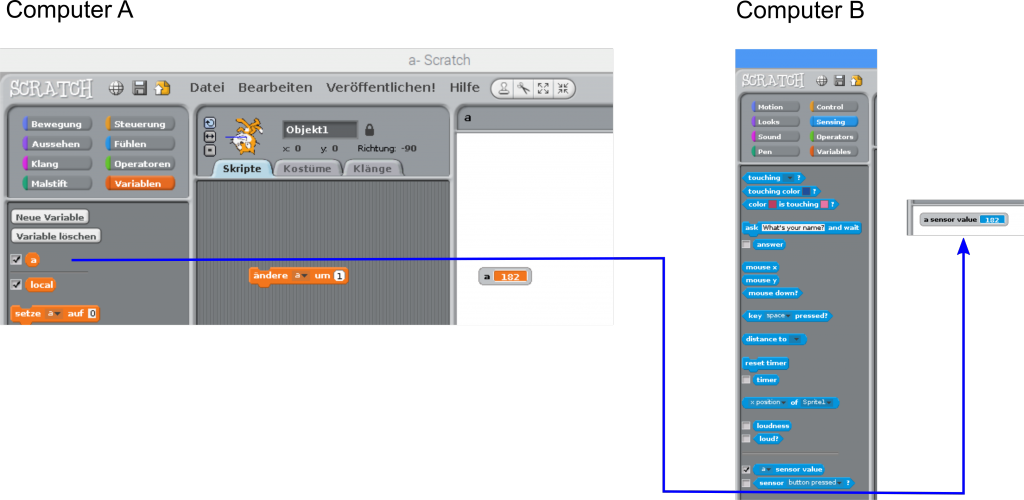
The variable (here ‚a‘) can only be changed on the one computer where it is is created. Sensor value can‘t be changed.

Best Practice

  • Scope: Variables should be ‘for this sprite only’ whenever possible. Use ‘for all sprites’ only if needed or when these should be transferred to other computer.
  • Naming: Variables and events which need to be transferred should get a special name which includes the sending computer name. So if sending computer is ‘box07’ and variable is ‘a’, then name is ‘box07.name’.

Problems, Constraints

Persist connection

The client side does not store it’s state in the project file. ‘join mesh’ needs to be done each time the project is opened.

Topology with scratchClient

scratchClient connection works on server side only. On client side, when sensor network is enabled then the mesh connection is stopped and thus scratchClient can’t be used.

The ‚enable remote sensor connections‘ command is not needed when ‚Host Mesh‘ is used.

Warning

ScratchClient issues a warning about an unknown command, but this does not stop anything.

Infrastructure

The involved computers need to be connected to a network.

When computers are configured to use fixed IP-Addresses, then for a two computer network a crossover-ethernet patch cable can be used.

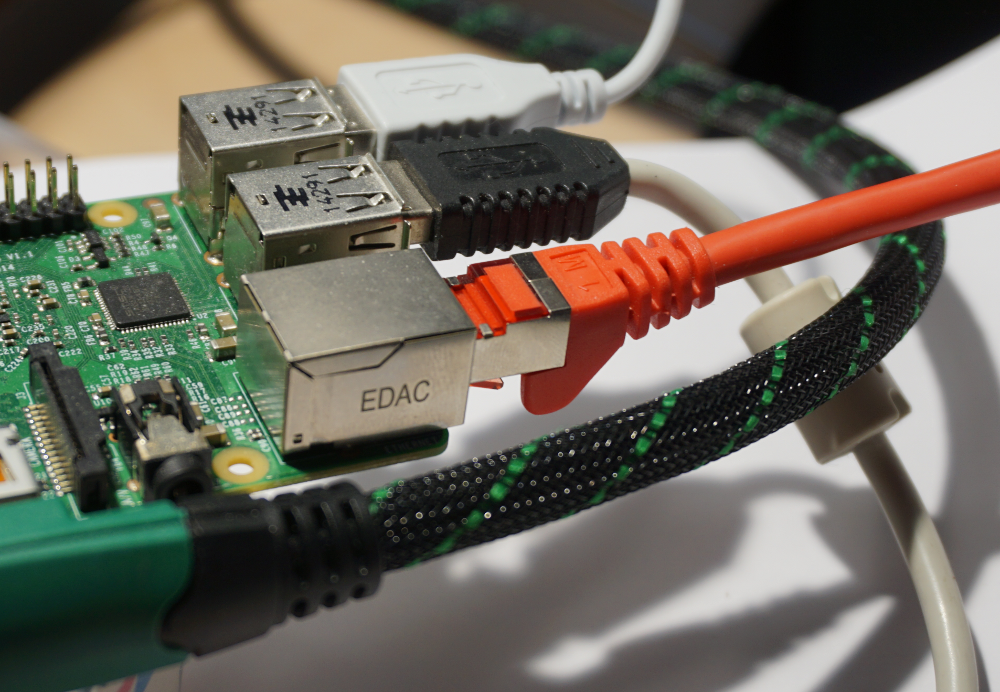
Network connection on a raspberry pi.

The color of a cable does not imply whether a normal connection or crossover connection type cable is used.

howto: Edit scratchClient Config Files

There was a question on how to edit scratchClient config files. There was the need to add a Button to a GPIO. Button inputs are handled by a GPIOEventInput-Adapter.

This short walkthrough will not explain all the details but will concentrate on

  • where to find the files
  • use an editor
  • copy / paste an adapter
  • adjust relevant sections
  • save
  • and run it.

Where to find the files

Configuration files for scratch usually are in directory /home/pi/scratchClient/config/ . The ‘/’ at the end is used to mark a path as a directory.

Use an Editor

Config files are XML-Files, eXtensible Markup Language with the ending ‘.xml’. There are special editors for these files, but as xml is plain text a text editor can be used to edit.
For almost each adapter type there is a sample in these files. We start to edit the marked file config_ikg_button_intern.xml as it already contains a GpioEventInputAdapter which will be modified. Right-click on the file and select ‘open with – Text Editor’.

When the file is open, there are sections visible in brackets. Adapter definitions start with <adapter> and end with the next </adapter>. There can be multiple of these sections in one config files which are activa6ted by scratchClient at a time.

The adapter is light grey marked in the above screenshot. The colors are different between various editors.

Copy / Paste an Adapter

Copy this adapter and paste behind an existing adapter, behind the </adapter>-element. The sequence in the file is not important. You will notice that the sequence is used for the display in the adapter view in the browser. But technically all adapters work the same independent from their position in the file.

Adjust relevant sections

The config file provides the data for scratchClient hoq the adapter shall work. Some of the information needs to be unique, other information is needed to have meaningful names in scratch.

  • Adapter-Name: give the adapter an unique name. Best is to use a name which is close to its use in the system, e.g. ‘button_22’ or better ‘button_motor_left’. The ikg_config files are quite generic and therefor have most times just numbers. As you will use these files for a project, choose more meaningful names.
  • GPIO-Pin: A GPIO pin is only allowed once in a file. Select a free GPIO pin. The numbering scheme is BCM-numbers. Do not choose GPIO used for SPI, I2C or the Hat-eeprom. These names are case sensitive.
  • Scratch-Name: an event-adapter has two event outputs for button_pressed and button_released. These need to be mapped to the names used in scratch. Use a meaningful name like ‘button_motor_left_pressed’ and ‘button_motor_left_released’.
  • The GPIO settings are ‘inverse =true’ for a button which is connected between GPIO and ground. Leave as it is. The poll.interval is 50 ms which is fast enough for even fast games.

Save the file

Save the file in a different location. Choose directory /home/pi/scratchClient/configuser/ which is dedicated for user files.
Files in userfiles are searched first at scratchClient startup. And will never be overwritten on updates.
Give the file a name which is releted to the project, e.g. config_project.xml. The extension ‘.xml is needed.

Run the file

Start scratchClient.

cd ~/scratchClient
python3 src/scratchClient.py -c userconfig/config_project.xml

The command line in scratchClient allows some flexibility to lookup the config files. The -c option allows to omit the extension and the prefix ‘config_’. The lookup procedure first looks in ./userconfig/’, if not found in ‘./config/’. The following command line is performing the same file lookup as above.

cd ~/scratchClient
python3 src/scratchClient.py -c project

Check the scratchClient browser adapter view localhost:8080.

The name button_motor is visible. The quite long scratch names are truncated, but this only in the view.

Editing a .xml file can be a challenge. If there are problems, scratchClient will reject to load the file and give error messages in the console.